Guide: Replacing a 2004-2011 Toyota Camry Wheel Bearing
Your 2004-2011 Toyota Camry was designed to be reliable and practical for many years—but some parts experience wear and tear on even the most economical vehicles. You’ll need to replace your Camry’s wheel bearings periodically if you want to keep driving it smoothly and safely.
Fortunately, we’ve got you covered. Find high-quality aftermarket wheel bearings for Toyota Camrys here, then read the guide below for step-by-step instructions on how to install them. Our bearings outperform others, and our guaranteed fit makes it easy! Let’s dive in.
Why Is It Important to Replace Your Wheel Bearings?
Your wheel bearings absorb friction during everyday driving maneuvers like accelerating, cornering, and braking. When they’re functioning properly, they help the wheels of your car turn smoothly and evenly, contributing to a safer and more comfortable experience behind the wheel.
But wheel bearings need to be replaced about once every 85,000 to 100,00 miles, or they’ll wear out. When this happens, the wheels on your car may no longer turn at the same rate, which can make your car harder to steer properly and can also impact your ability to brake effectively. For this reason, replacing your wheel bearings on time with high-quality parts is a vital part of operating your car safely.
What You’ll Need Before You Begin

Replacing Your 2004-2011 Toyota Camry Wheel Bearing? This is the part you need!
View productImage does not represent actual product
Here’s what you’ll need to replace a wheel bearing on your 2004-2011 Toyota Camry by yourself:
- 2004-2011 Toyota Camry wheel bearing and hub assembly
- Sockets
- Wrench
- Floor jack
- Jack stands
- Pry bar
- Impact gun
- Hammer
 Via TRQ on YouTube.
Step 1: Lift Your Vehicle Off the Ground
You’ll want to elevate your car off the ground before you do anything else. Using your jack, support the car on the subframe. Then secure it in place and remove the hubcap.
Next, remove the five 21mm lug nuts holding your car’s wheel in place. Once you’ve taken them off, you should be able to remove the wheel itself—gently tap it from the back with a hammer wrapped in a cloth if you’re having trouble.
 Via Cars.com.
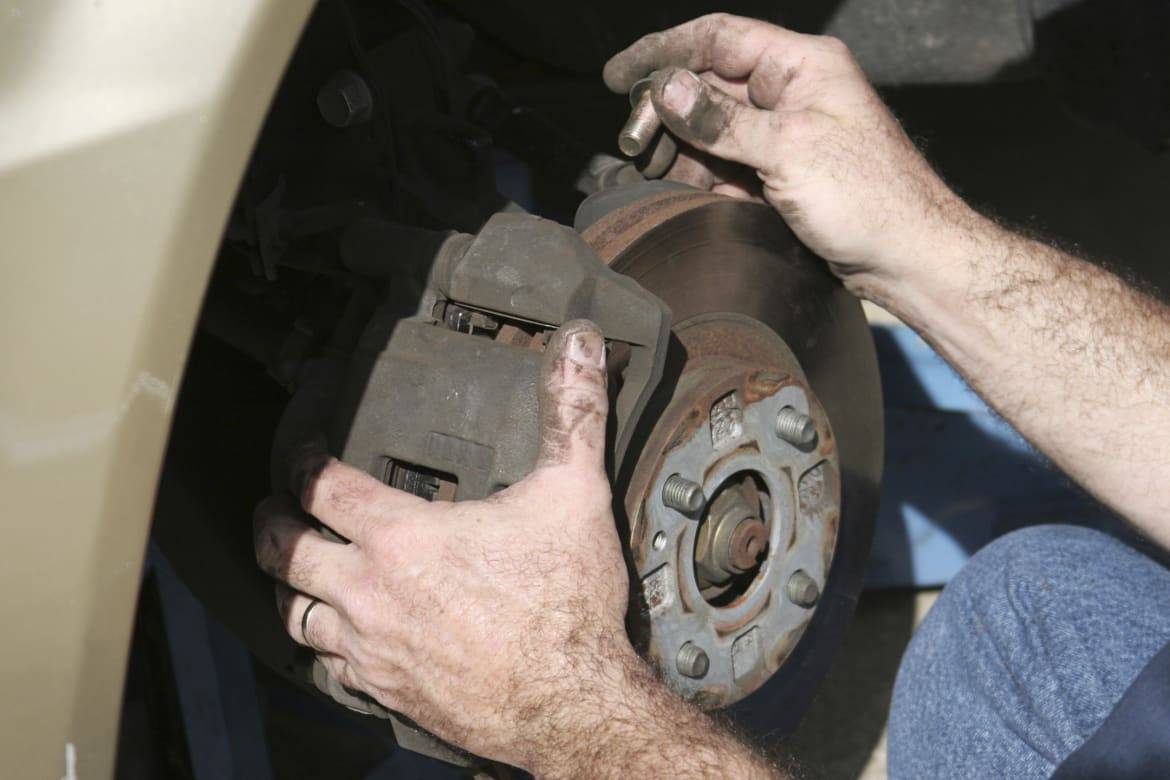
Step 2: Remove the Brakes
Next, you’ll want to take off the caliper. To do this, insert a pry bar between the caliper and the rotor and gradually apply leverage until it becomes loose. Then, remove the two 17mm bolts holding in the caliper bracket, then slide the caliper up and remove it from the rotor. Hang it on a hook away from the rest of the wheel.
Once the calipers are off, you can remove the rotor. Again, you may need to gently tap it from behind to loosen it up sufficiently. If you’re replacing the rotors, there’s no need to be precious here—but if your current rotors are still good and you want to keep using them, be gentle and avoid damaging the lug studs during this part of the process (again, we recommend wrapping a hammer in cloth and tapping gently near the outside of the rotor for best results).
Finally, use a 12.30mm socket to remove the axle nut and set it aside. Then use your hammer to drive the axle out of the bearing area.
 Via Jeff’s Auto.
Step 3: Remove the Wheel Knuckle
Your next step will be to remove the 10mm bolt holding the ABS sensor in place. Then remove the ABS sensor from the knuckle and set it aside.
Remove the outer tie rod end from the knuckle by removing the cotter pin that holds it in place. You can use a hammer to loosen the tie rod, but leave the nut on the end so as not to damage the threads while doing so. Once the tie rod is loose, remove the nut and slide the tie rod out.
Next, remove the two bolts holding the wheel knuckle to the strut by using a wrench and 22mm socket.
One 17mm bolt and two 17mm nuts connect the rest of the knuckle to the control arm. Remove these with a socket and set them aside. Hold the knuckle as you do so that it doesn’t fall off—once these are gone, you should be able to remove the knuckle completely!
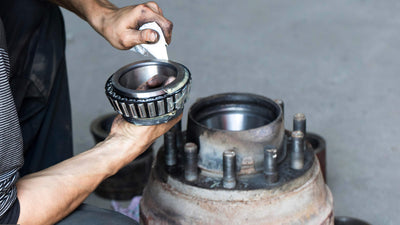
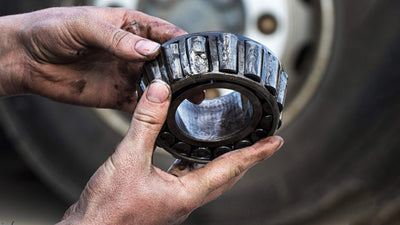
Now it’s time to remove the old bearing from the knuckle. To do this, you’ll have to remove the snap ring holding the old bearing in place (you can use a pair of pliers). You may need to use a press to drive the old bearing out. Then clean the area before installing the new bearing.
Step 4: Install the New Bearing & Hub Assembly
When pressing the new bearing in, be sure to apply pressure to the outer lip, not the inner portion of the bearing. Press it straight into the knuckle and make sure it doesn’t lean over to one side. Then reapply the snap ring and use a pry bar to knock it down into place.
Place the hub up and through the bearing, pressing only on the center portion of the bearing.
Line up the hole in the ABS shield with the hole in the knuckle and tap the edges down with a hammer so that it goes down as far as possible. Now you can start putting the knuckle back onto the car.
 Via TRQ on YouTube.
Step 5: Put the Knuckle Back In Place
Slide the axle into the bearing while moving the ball joint studs into the lower control arm. Next, start the bolt and nuts that connect the knuckle to the control arm. Torque each to 55 lb-ft.
Now it’s time to replace the bolts that hold the wheel knuckle to the strut. Put the nuts on and torque each one to 133 lb-ft.
Slide the ABS wire over the knuckle and back into its original position. Then, place the ABS sensor back in place and replace the mounting bolt.
Replace the tie rod end and torque the nut on top to 36 lb-ft. Make sure the slot of the nut is lined up with the hole in the top of the tie rod so you can get the cotter pin back in. If you can’t, keep tightening the nut until you’re able to replace the cotter pin.
 Via TRQ on YouTube.
Step 5: Put the Rotor and Brake Assembly Back On
Make sure the rotor you’re putting back (whether it’s the original or a new one) is clean, then slide it back on and keep it in place by starting one of the lug nuts and bottoming it out.
Take the caliper and slide the brake pads on over the rotor. Start both of the bolts that hold the caliper in place and bottom them out. Then torque them to 79 lb-ft.
Step 6: Put the Wheel Back On
You’re almost done! Replace the axle nut and tighten it by hand with a ratchet. Torque it to 217 lb-ft.
Check to make sure your ABS wire is connected and the flex hose for your brake caliper isn't twisted. Then, remove the lug nut you started earlier so you can replace the rest of the wheel. When it’s on, put back each of the lug nuts in a criss-cross pattern and torque them to 76 lb-ft each. Put the hubcap back on—congratulations, you’re done!
Video Walkthrough
Need to see this process for yourself? Don’t worry; we found a great video that shows you exactly how to perform the steps described above. Check it out below:
Enjoy a Smoother Ride in Your 2004-2011 Camry
Hopefully, our high-quality parts and the instructions above give you everything you need to successfully replace the wheel bearings and hub in your 2004-2011 Toyota Camry. If you have any questions about the process (including buying parts for your vehicle), contact us and speak with a team member who will be happy to tell you what you need to know!
Share this
Explore more
Continue Reading